


明德扬千兆网工程上板演示说明
作者:肖肖肖
今天将明德扬千兆网工程上板效果与大家分享一下,本工程使用了明德扬MP801开发板,最终可以达到千兆的网络传输,一起来看一下:
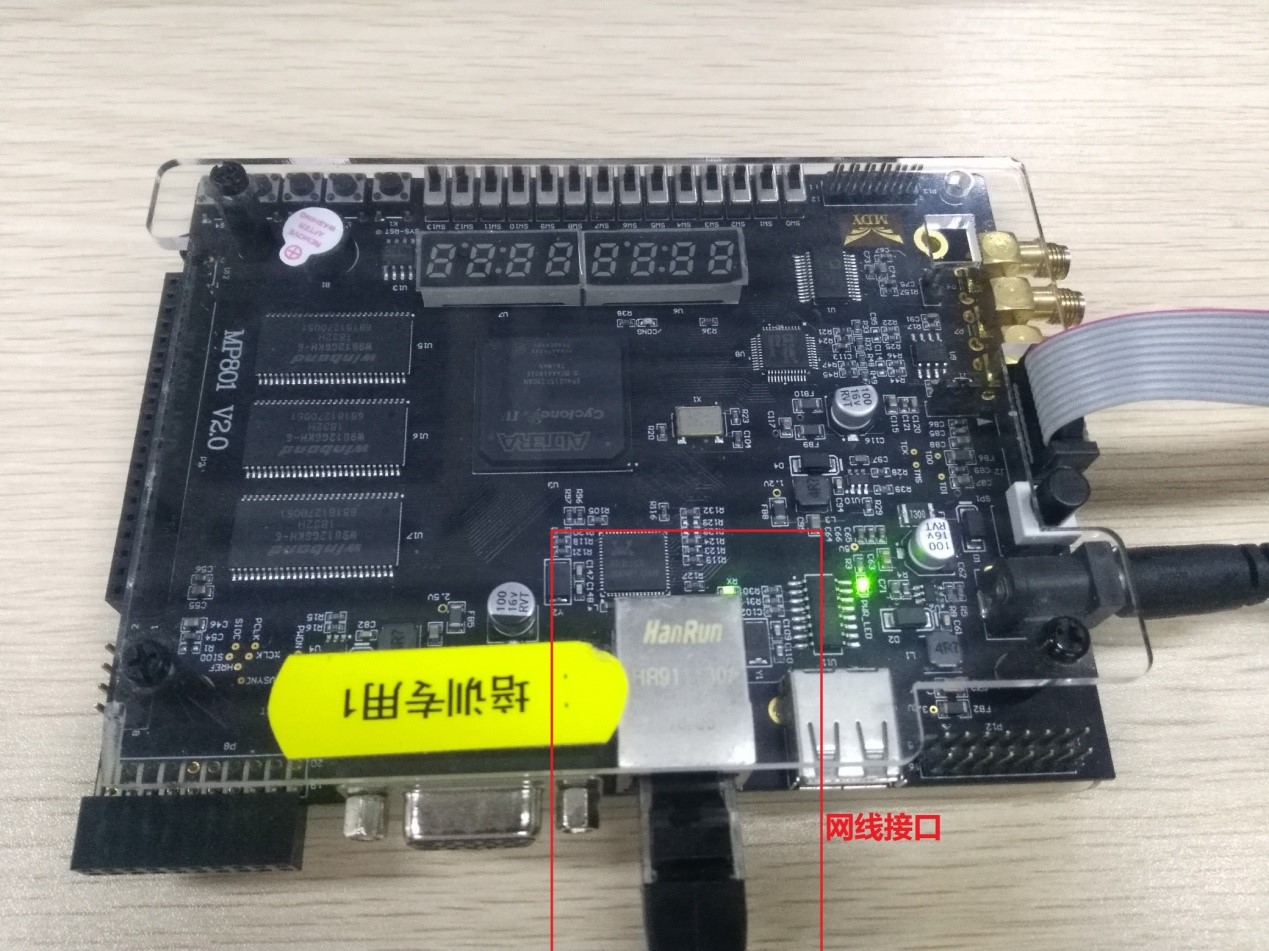
一、 板子外部接线
下图为明德扬MP801开发板,需要连接下载器、电源线和网线三个部分:
二、quartus烧录进板
连接好硬件后将工程文件烧录进开发板。
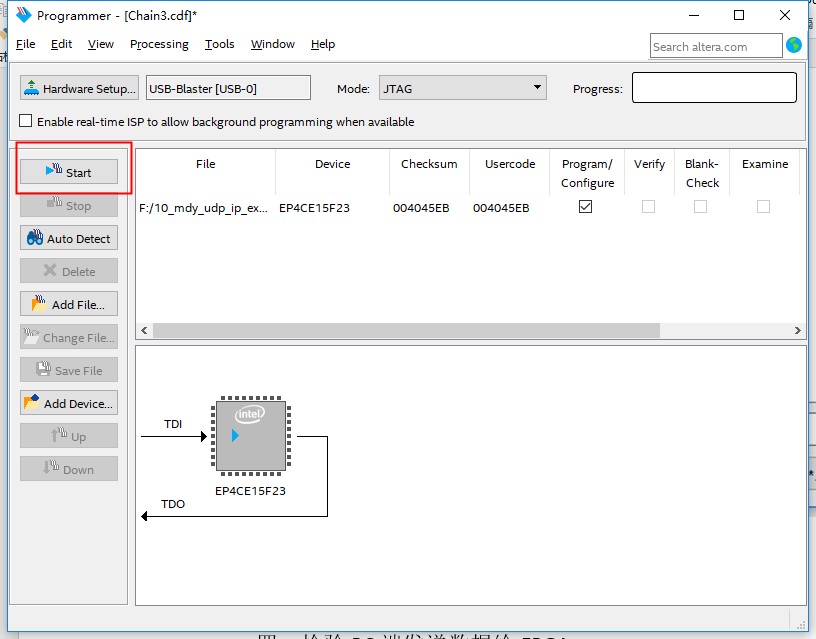
1. 打开quartus,点击 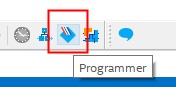
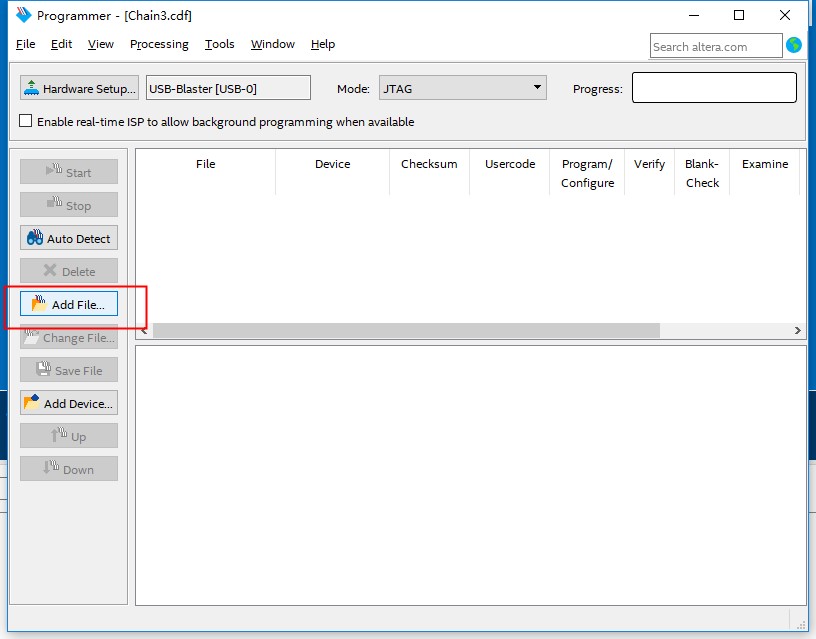
2. 出现Programmer界面后,点击 Add File 添加工程 .sof文件
3. 添加对应工程的.sof
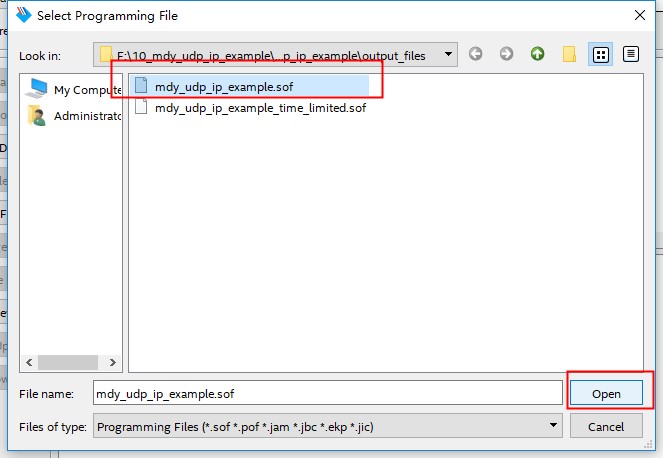
请注意区别一下文件名。
4. 添加成功后,点
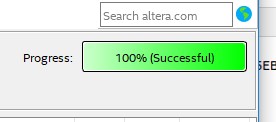
5. 下载成功
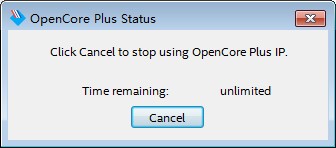
6. 如果弹出以下界面,说明MAC IP核还没有破解,不需要理会,不要点Cancel,直接使用即可。
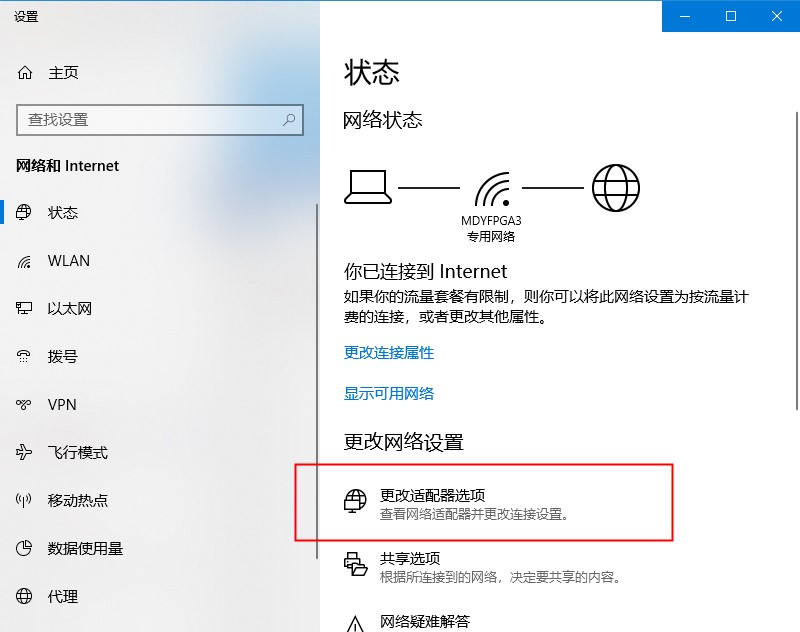
三、网络设置
1. 打开“网络和Internet设置”,选择“更改适配器选项”
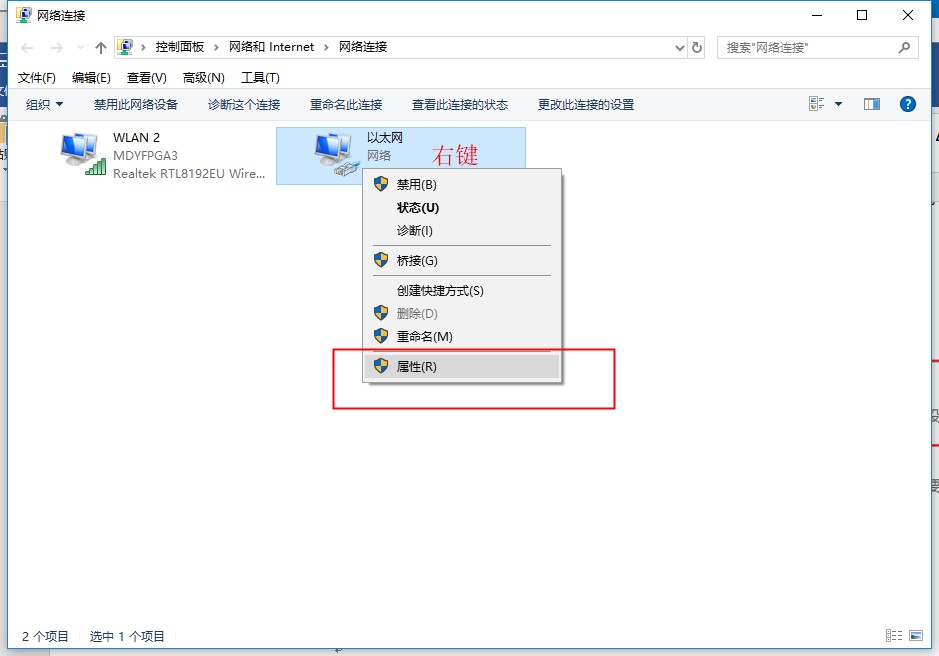
2. 选择“以太网”,右键,选择“属性”
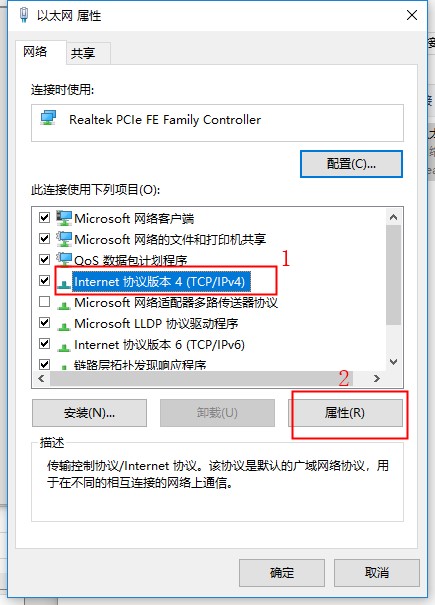
3. 界面出现后,选择IPv4,点击“属性”
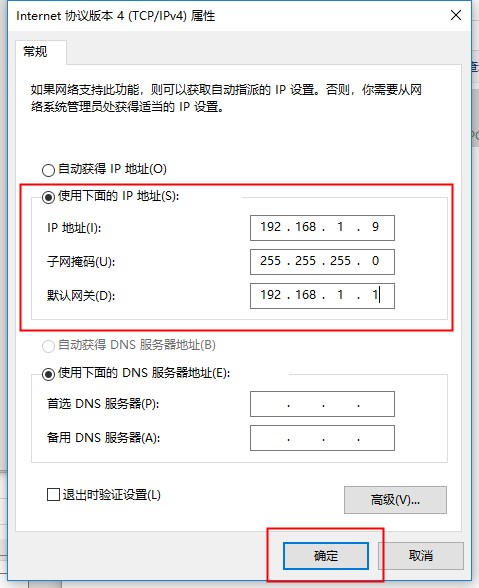
4. 手动配置相关信息,“默认网关”我们统一填写192.168.1.1
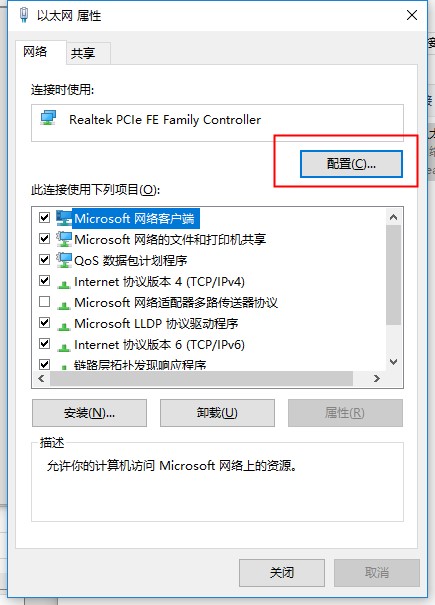
5. 回到 以太网属性 界面,点击“配置”
6. 出现 Realtek PCle FEFamily Controller属性 界面,选择“连接速度和双工模式”,选择“1.0Gbps全双工”:特别注意下,这里如果没有看到1.0 Gbps选项,说明你的电脑是百兆网的网口,不支持千兆网的传输。那么需要你更换一台支持千兆网接口的电脑。否则后面都不能正确显示。
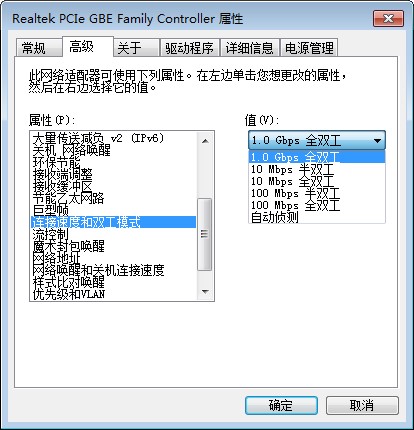
注意!!!如果没有1.0Gbps选项,说明你的电脑是百兆网的网口,不支持千兆网的传输。那么需要你更换一台支持千兆网接口的电脑。否则后面都不能正确显示。
四、检验FPGA发送数据给PC端
1. 打开Wireshark 软件 
2. 选择“Edit(编辑)” — 选择“Preferences(首选项)”— 打开“Protocols”— 找到“UDP”—勾选第三个选项“Validate the UDP checksum ifpossible”— 点击“确定”,该选项的目的,是为了让WIRESHARK对UDP的校验和进行校验,指出正确还是错误。如果不勾选,则不会进行校验:
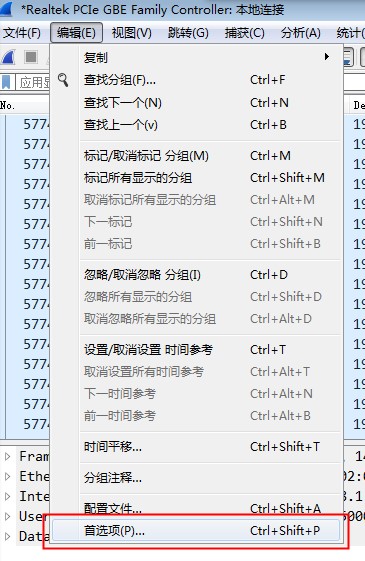
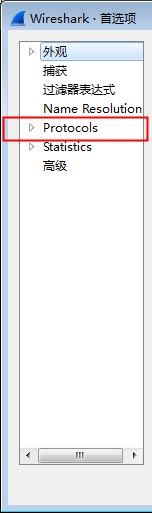
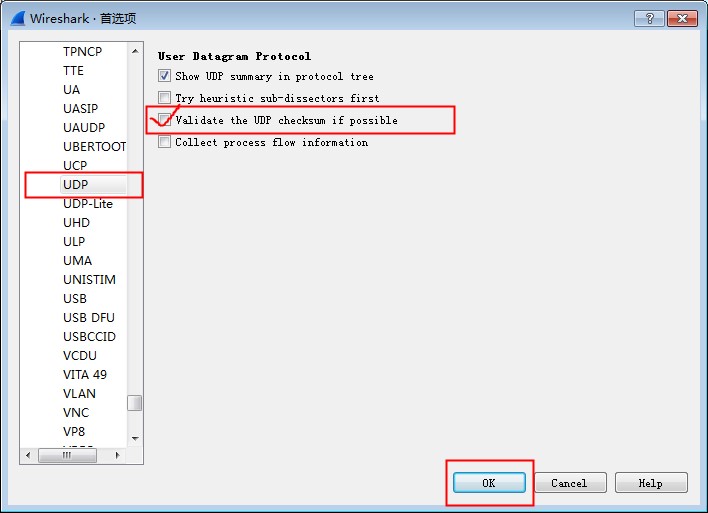
该选项的目的,是为了让WIRESHARK对UDP的校验和进行校验,指出正确还是错误。如果不勾选,则不会进行校验。
3. 双击选择
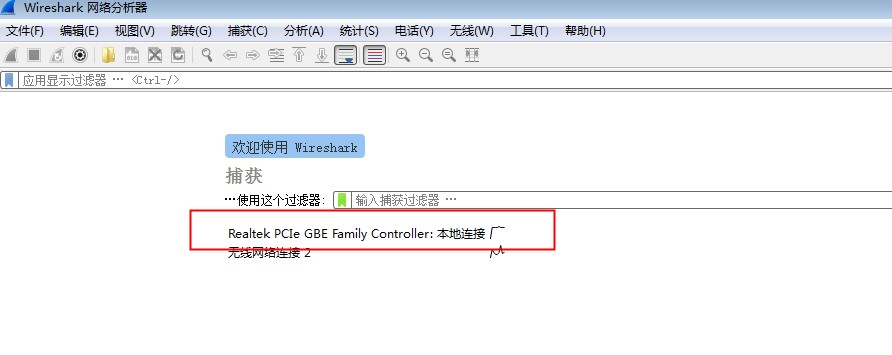
注意要选择本地网络,就是与板子相连的网口所对应的网卡。
4. 搜索栏输入“not gvsp and not icmp” ,把ARP、UDP协议过滤出来;
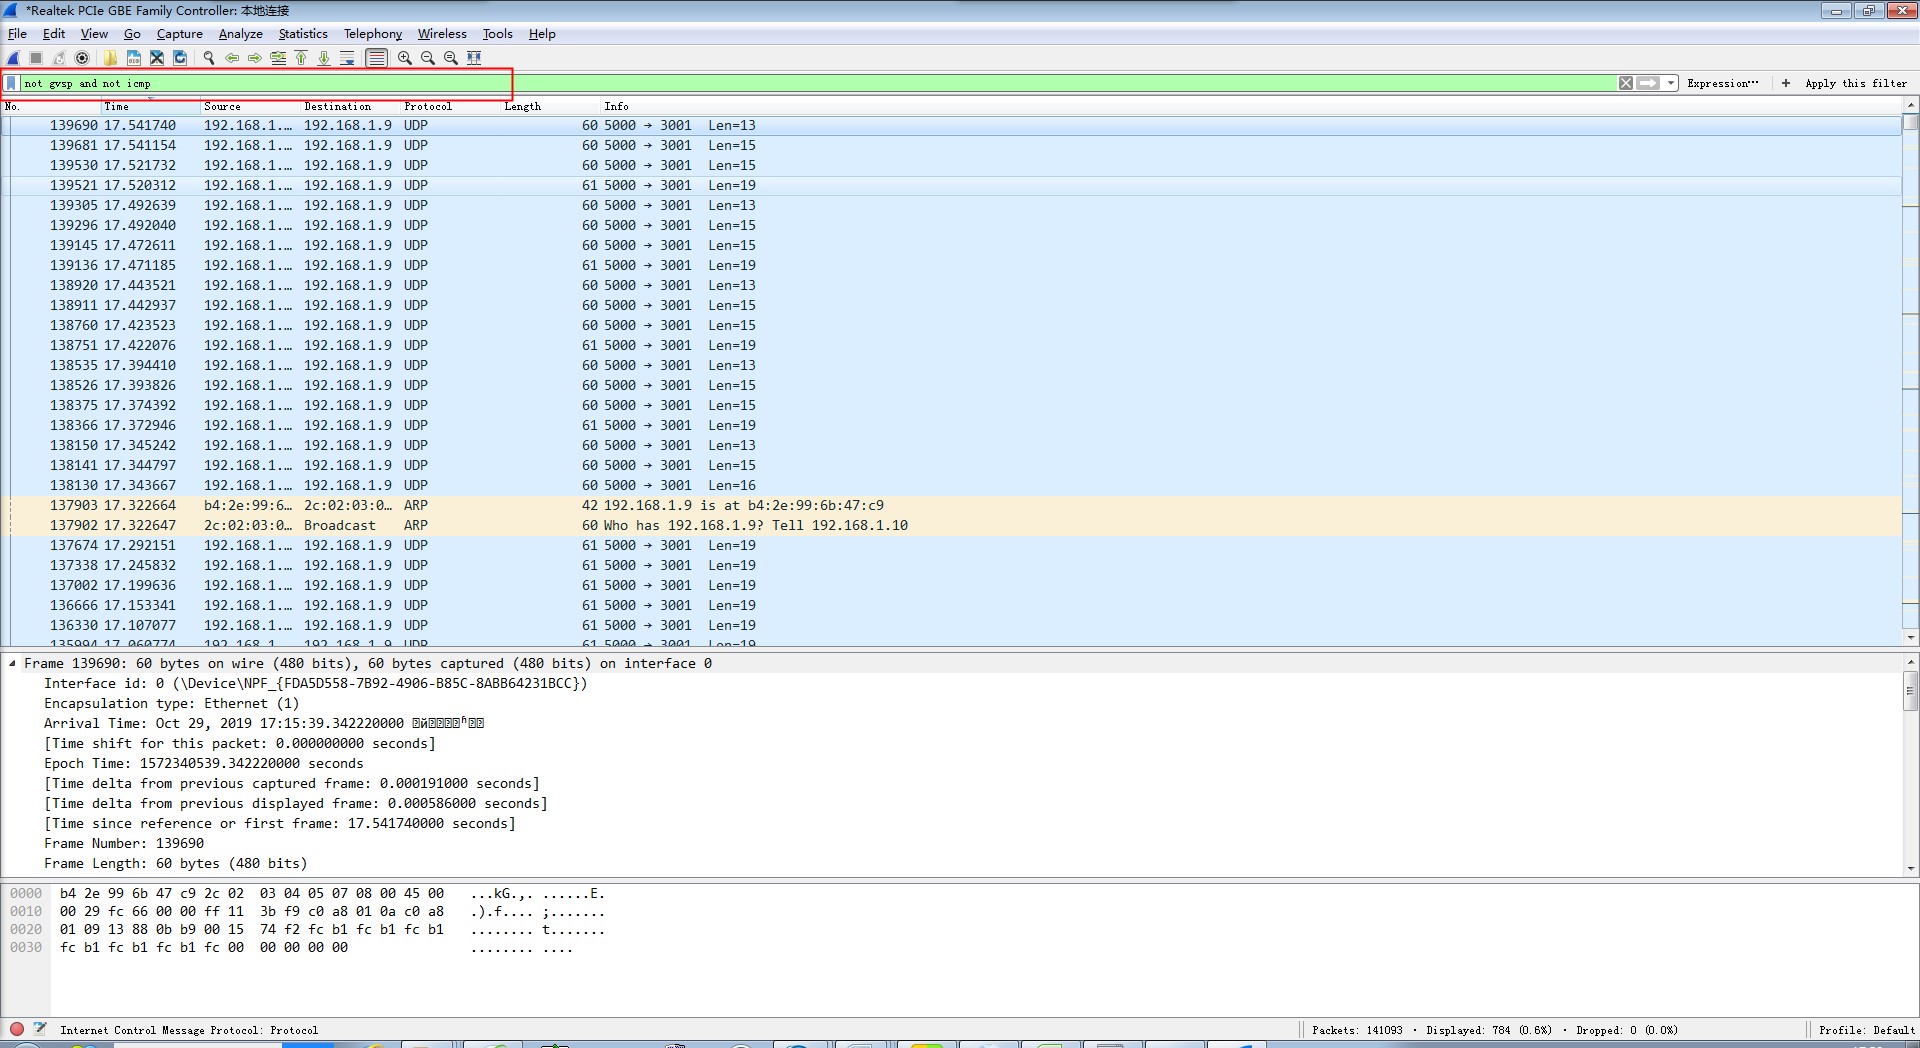
或者搜索栏输入“arp”或者“udp”,把ARP协议和UDP协议单独过滤出来。
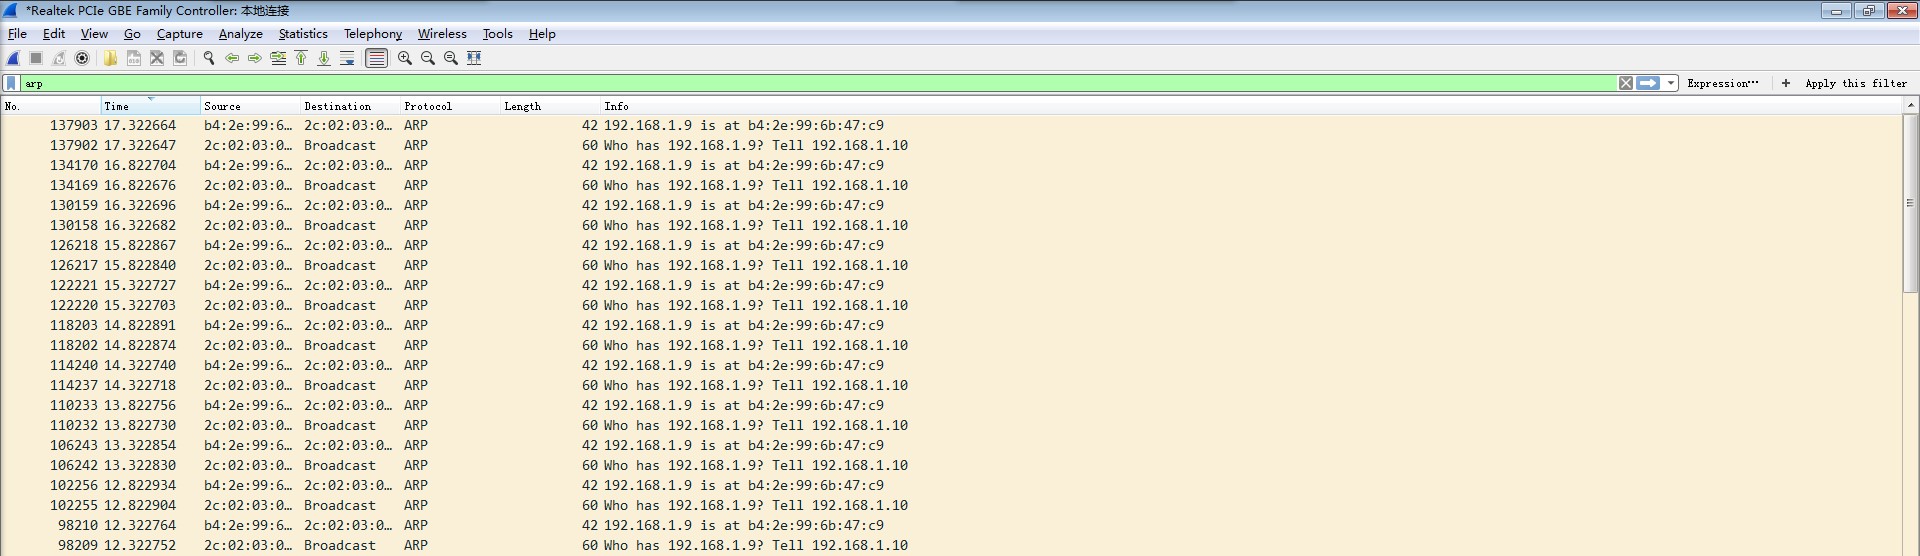
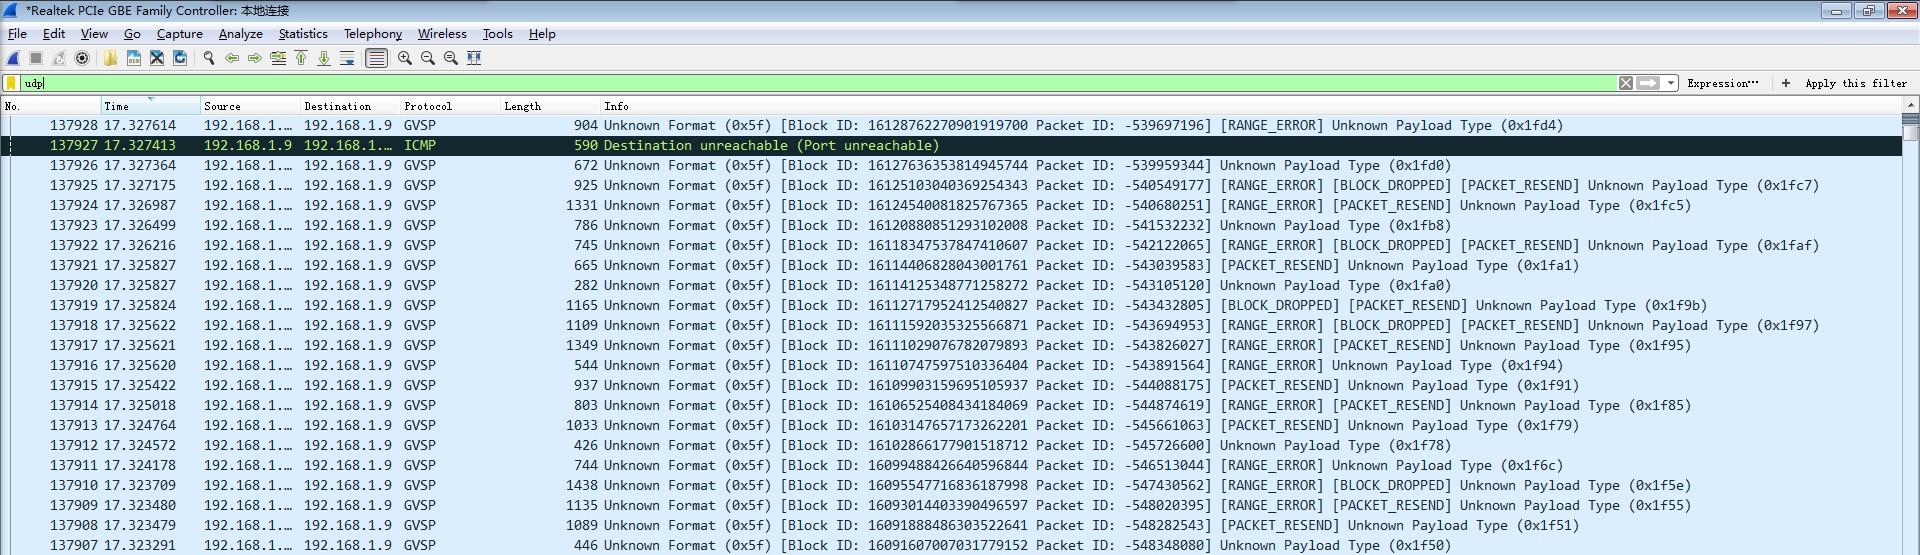
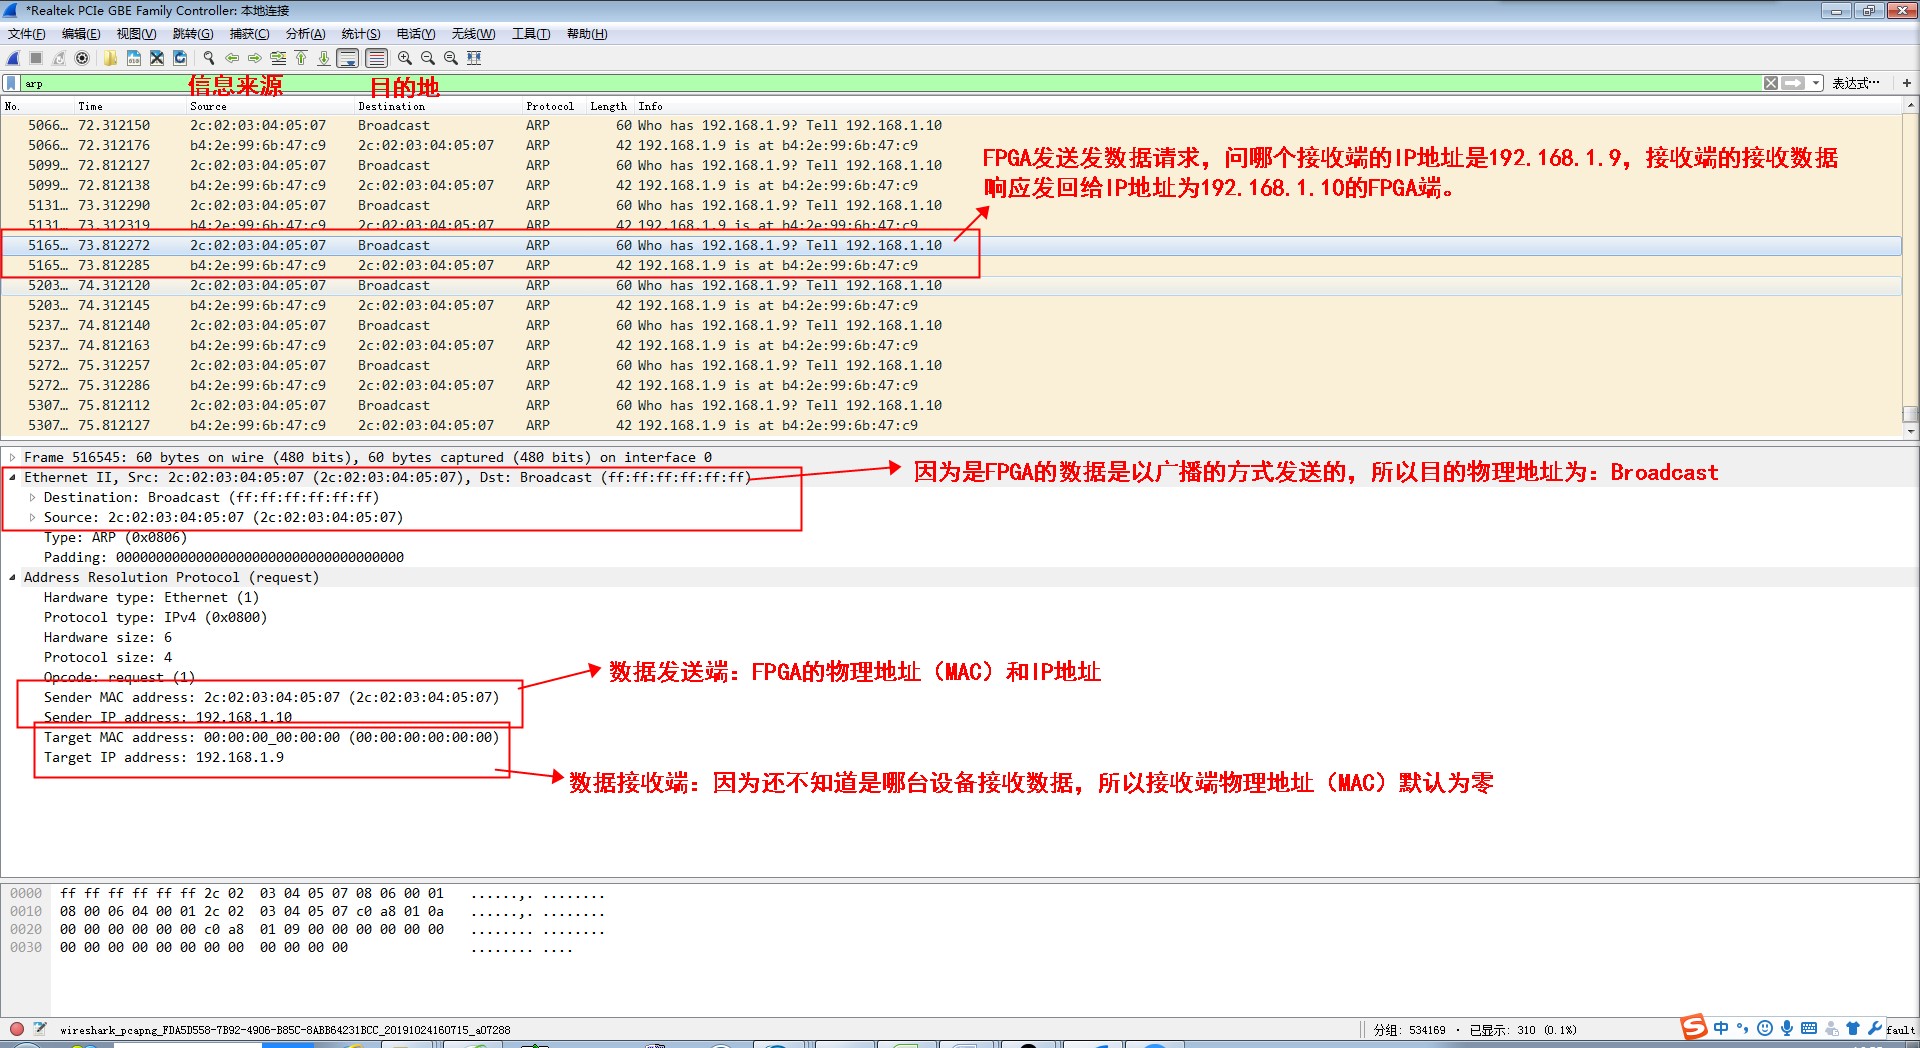
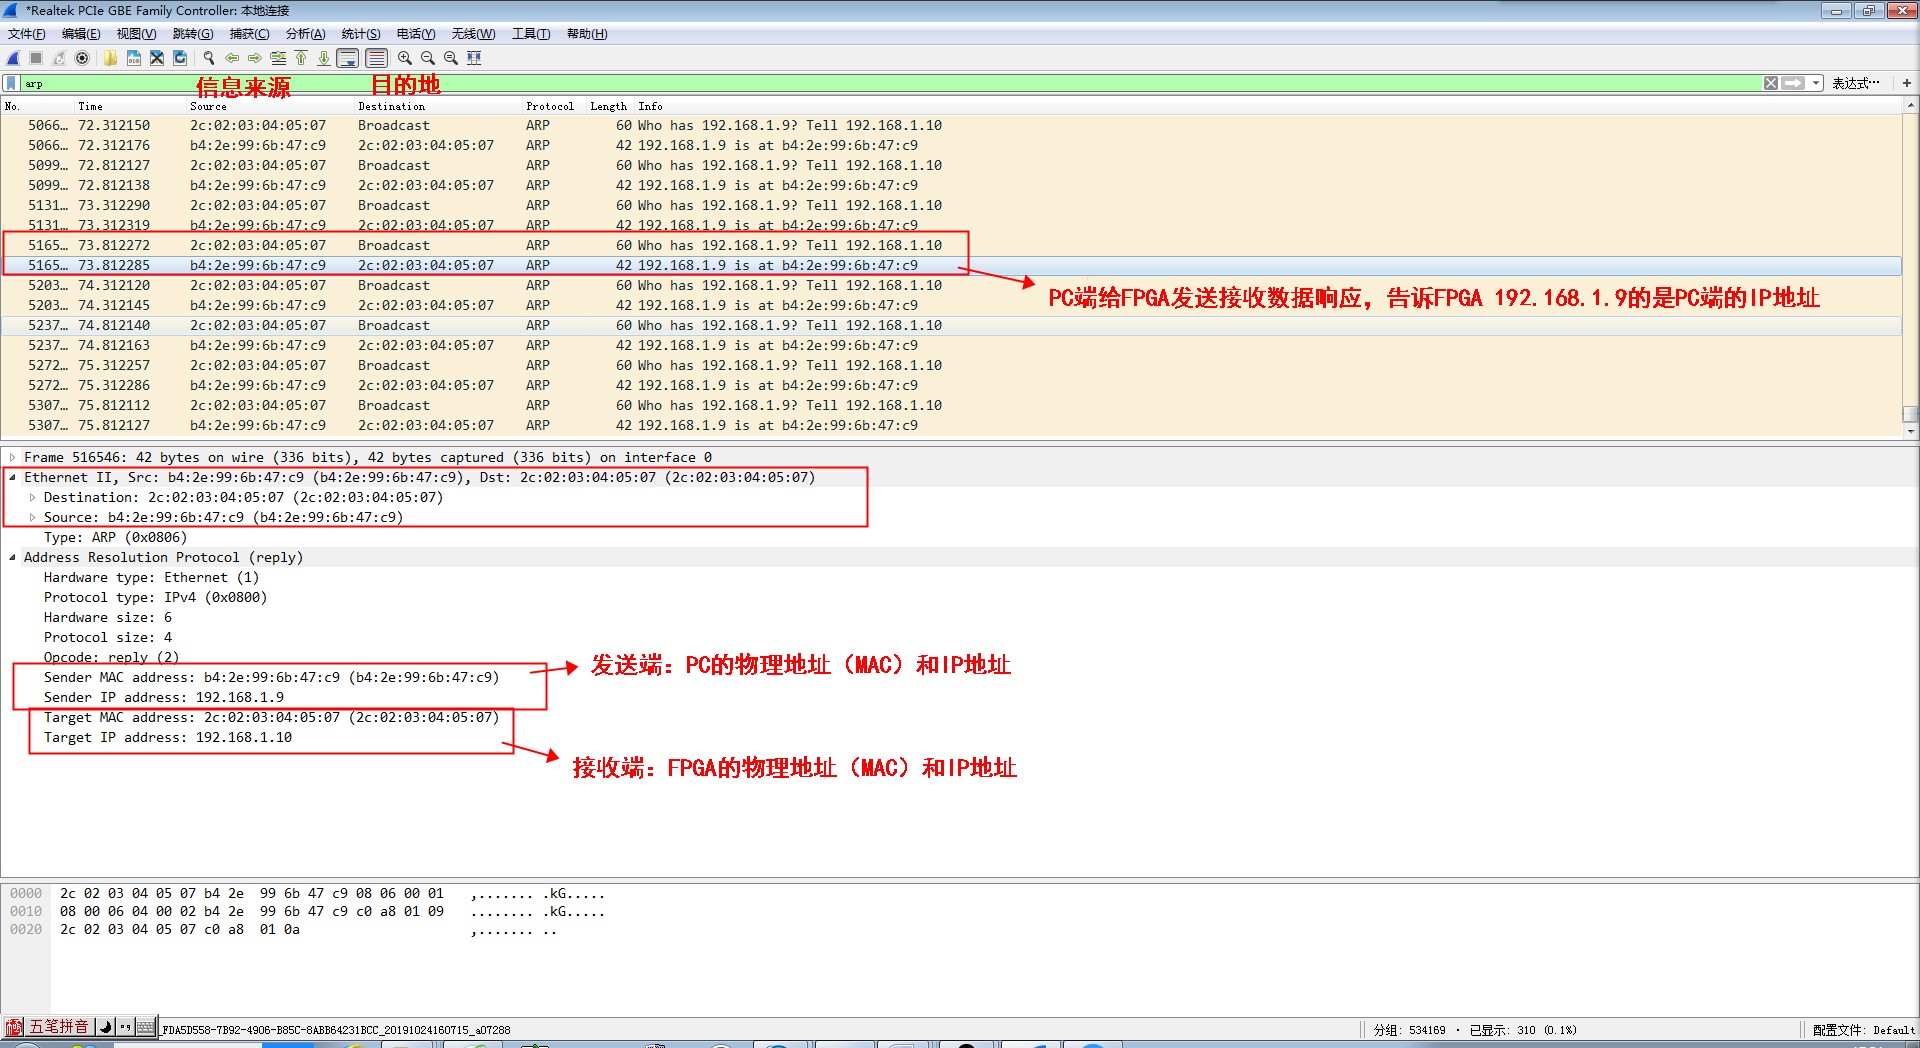
5. 当出现连续的、成对的ARP协议信号时的 现象才是正确的
五、检验PC端发送数据给FPGA
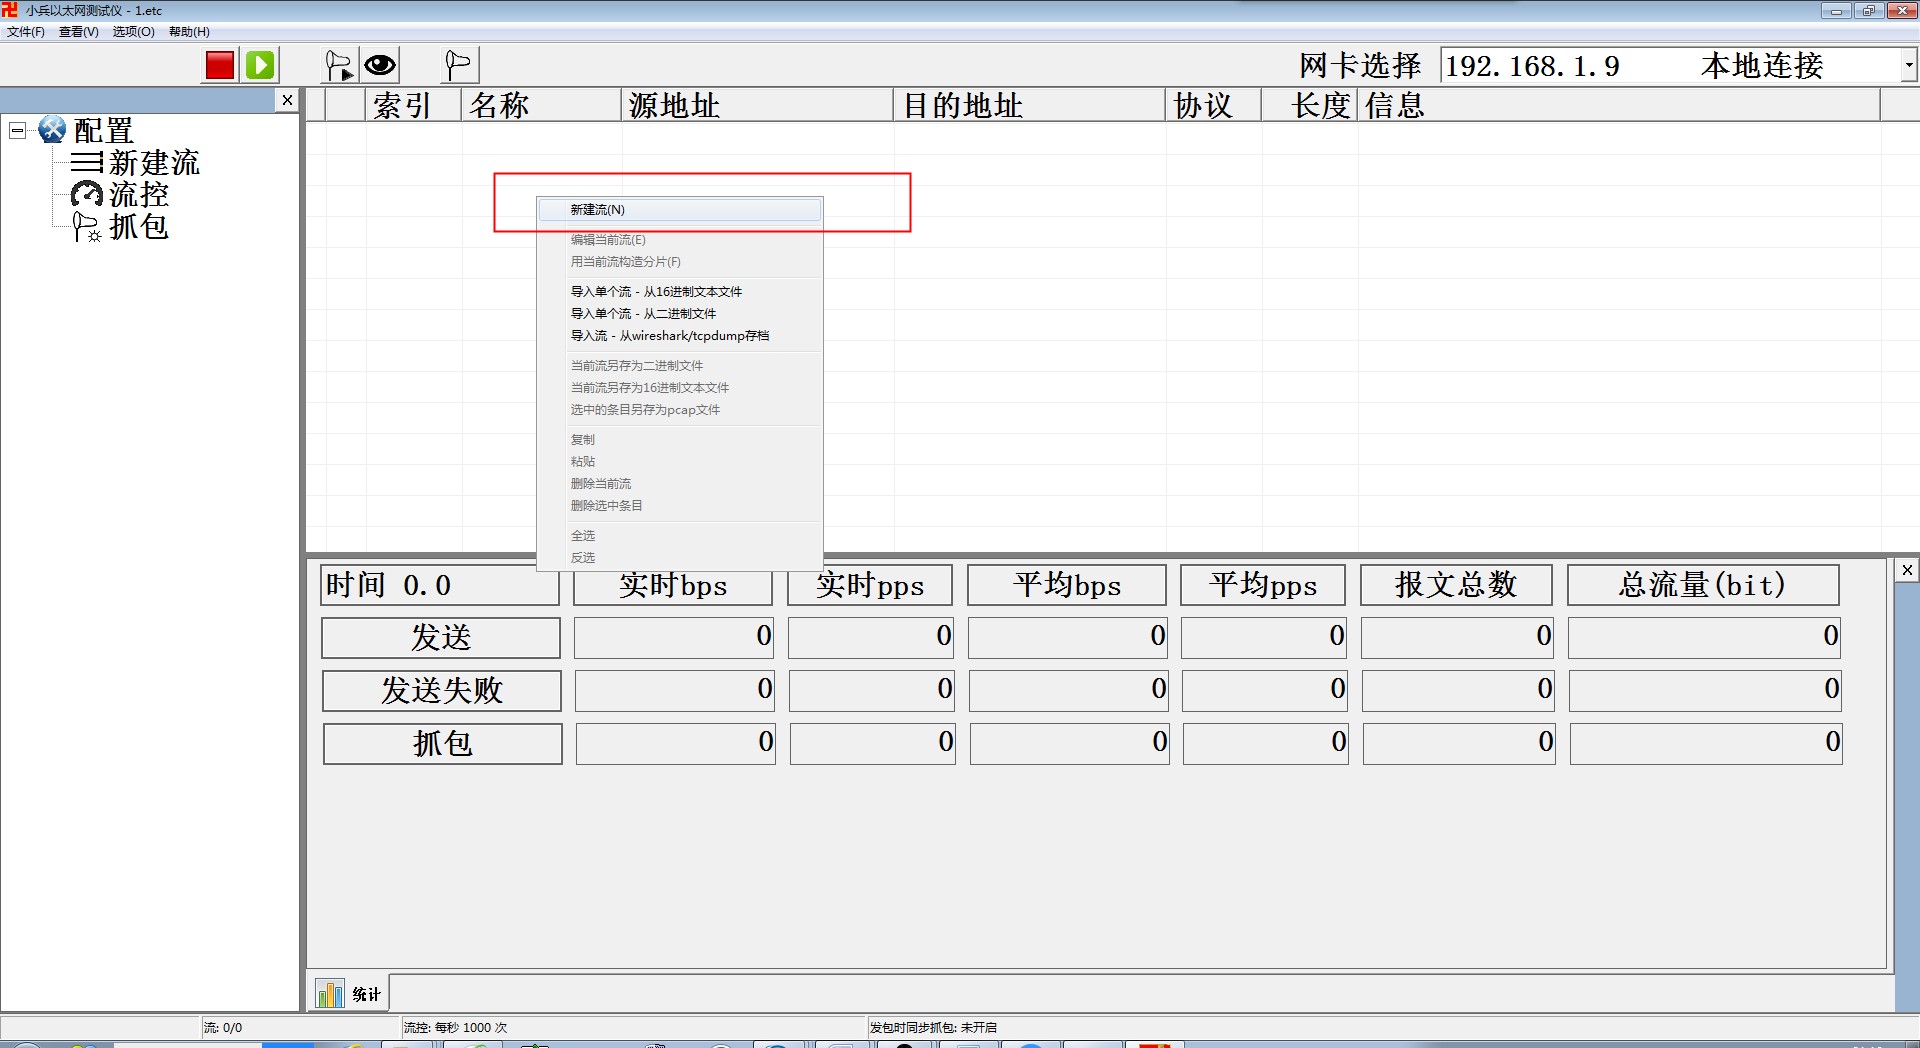
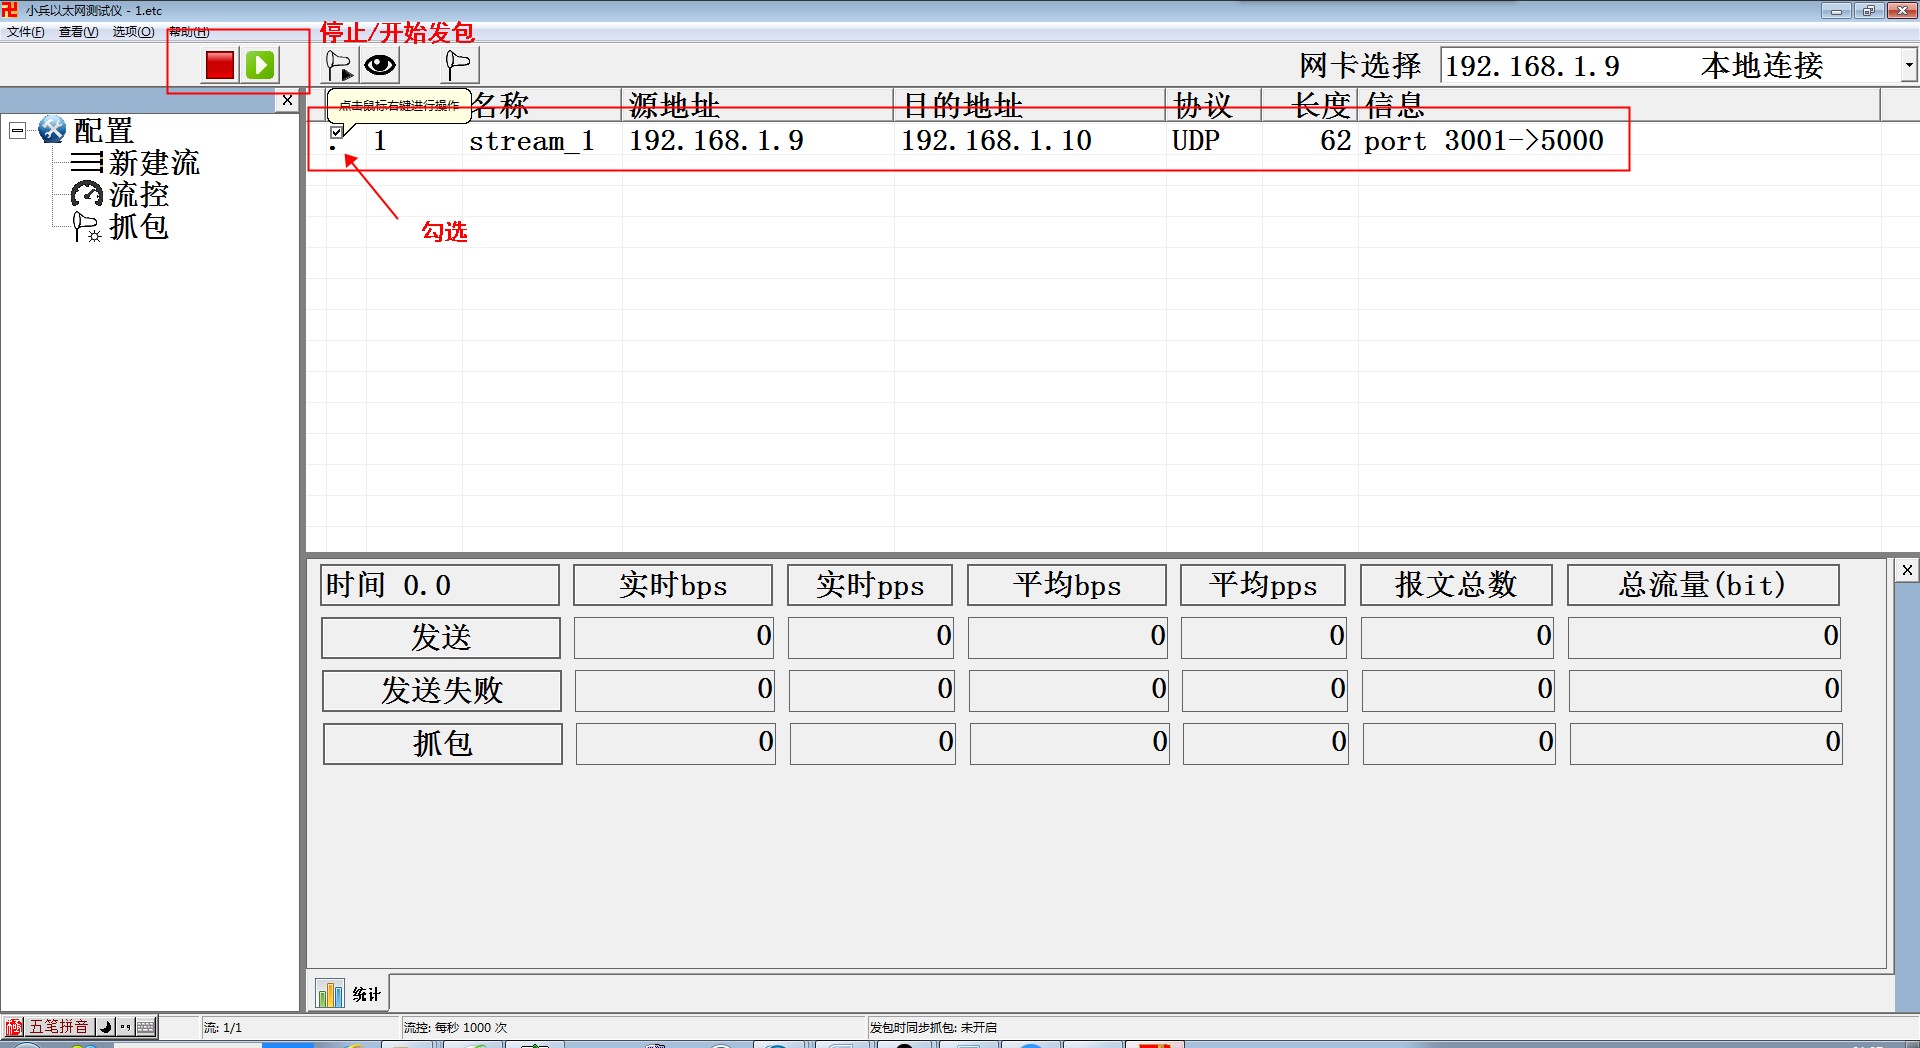
1. 打开 小兵以太网测试仪 软件 
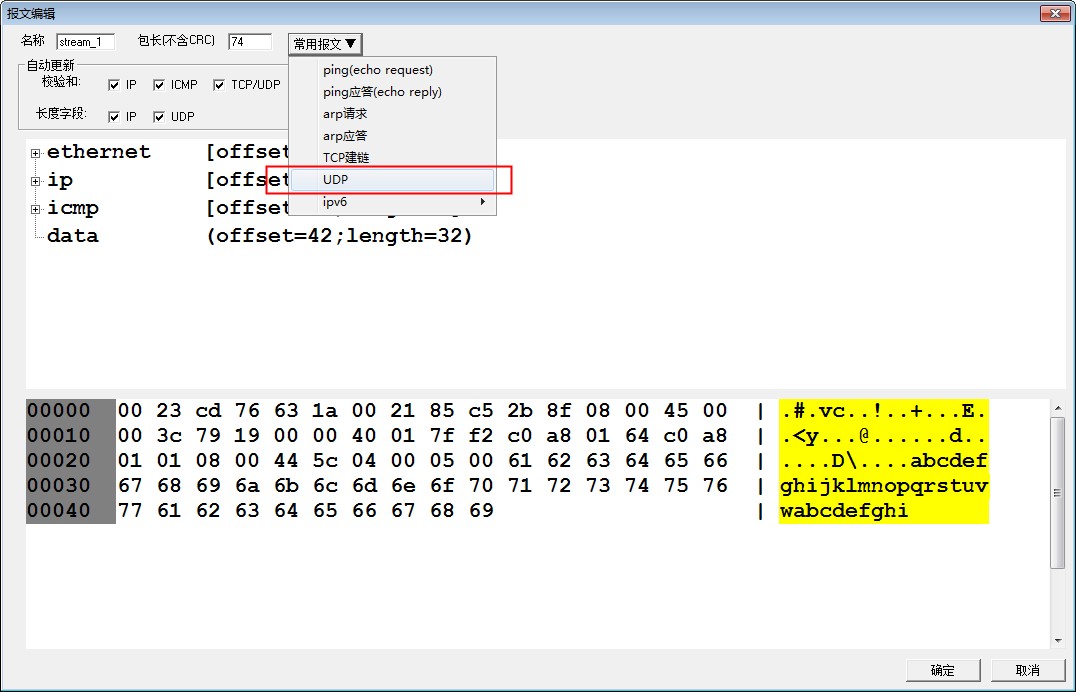
2. 右键,选择“新建流”
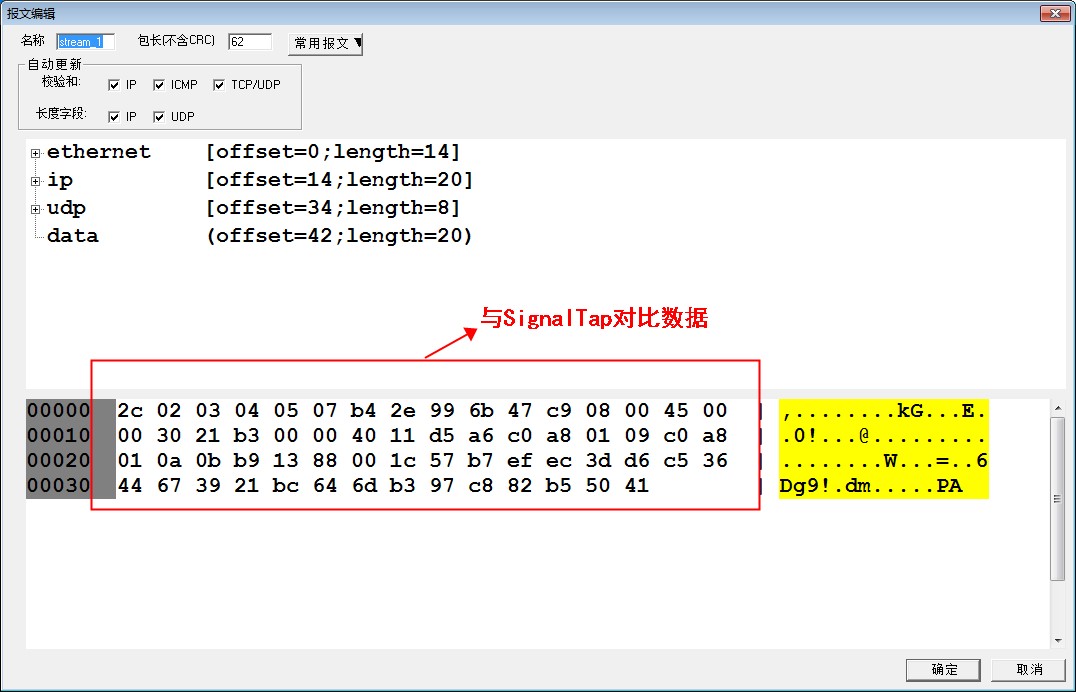
3. 出现一下界面,点击“常用报文”,选择“UDP”
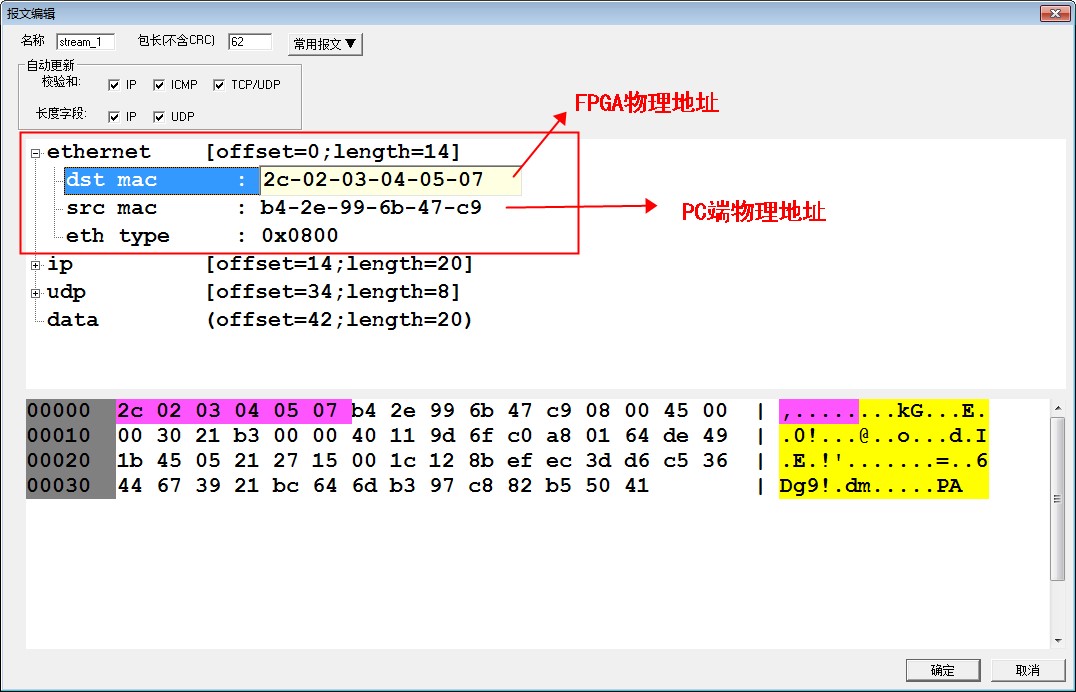
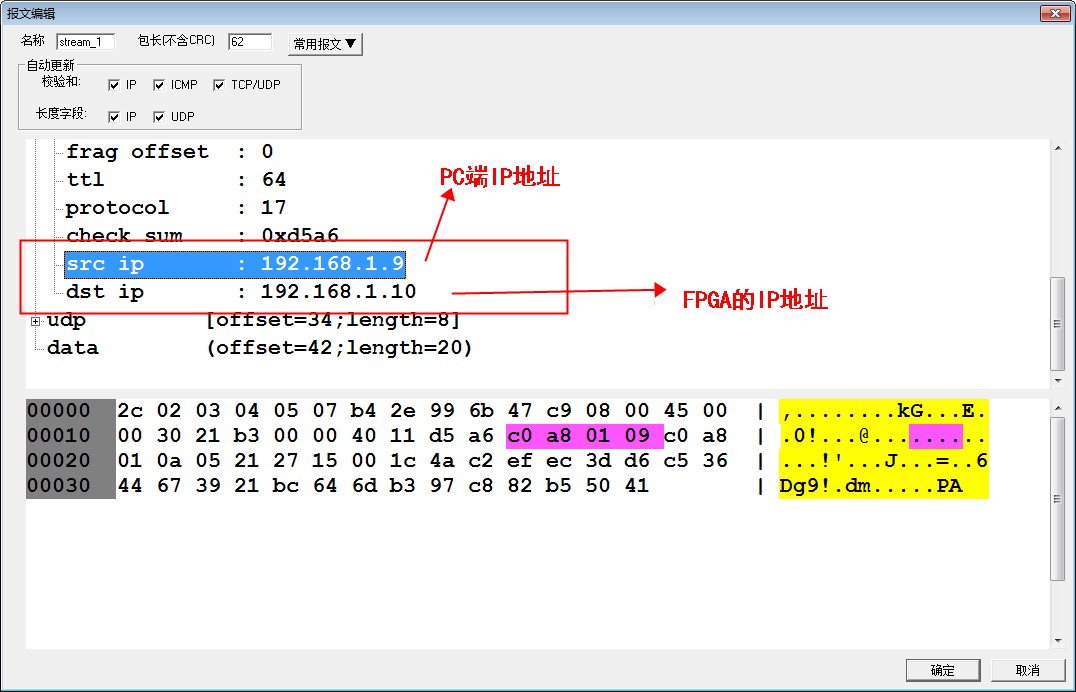
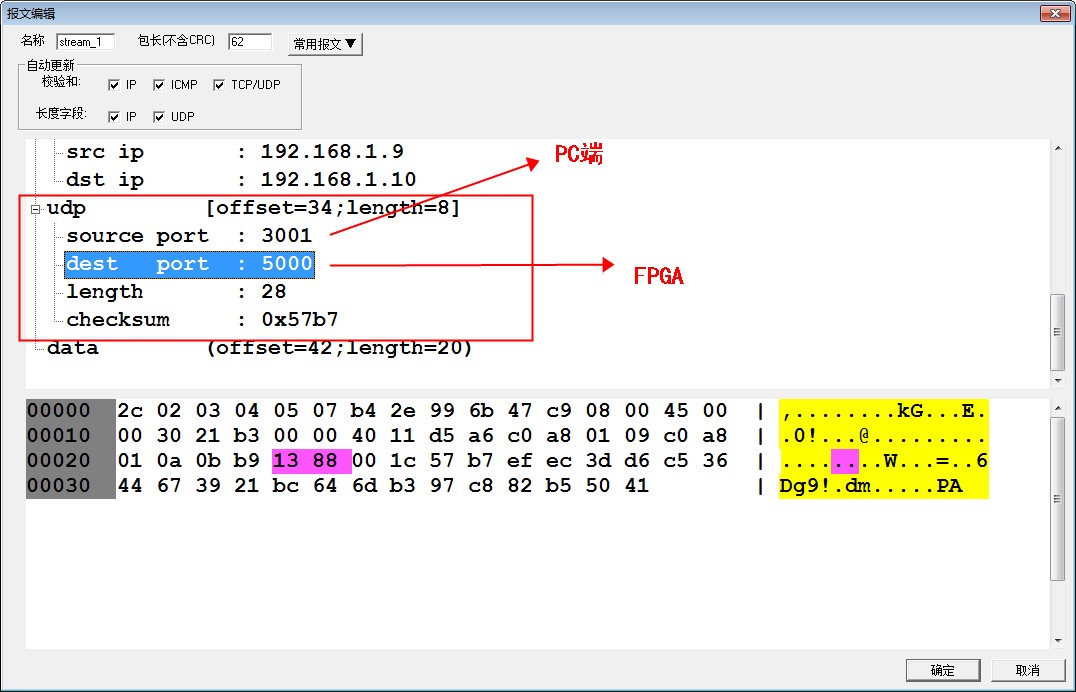
4. 参数参考如下:
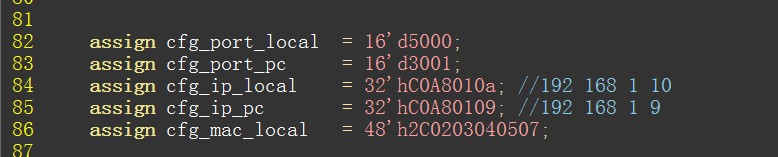
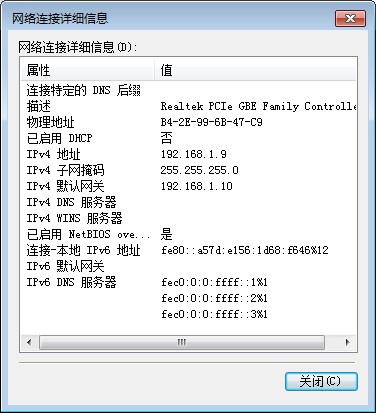
5. 在相应位置输入对应扥IP地址、物理(MAC)地址、端口号,然后确定
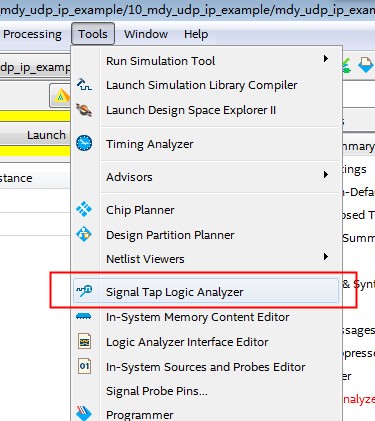
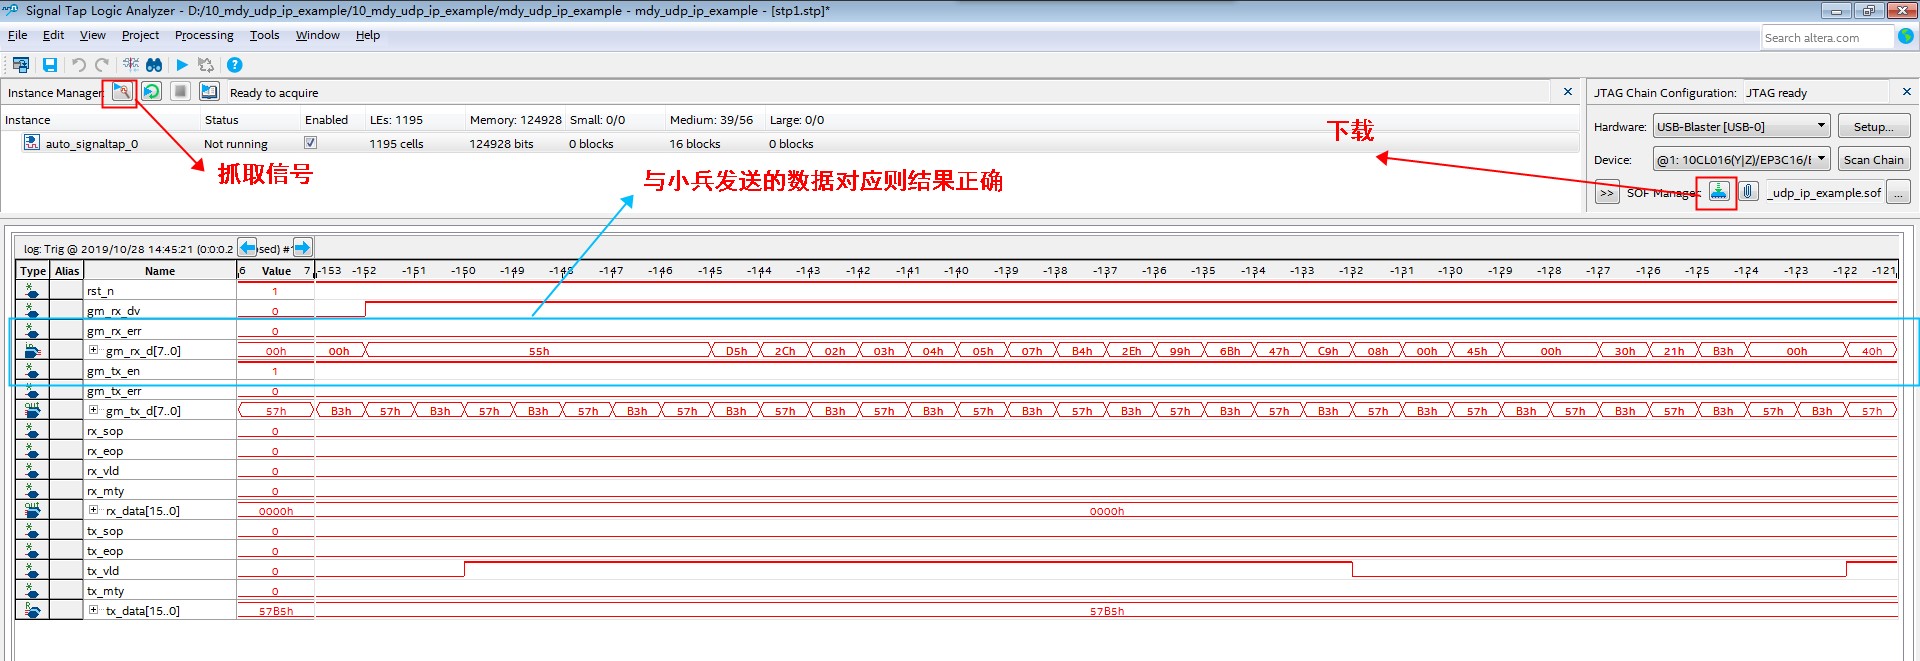
6. 打开quartus ,点击“Tools”,选择“SignalTap”
7. 添加相关信号
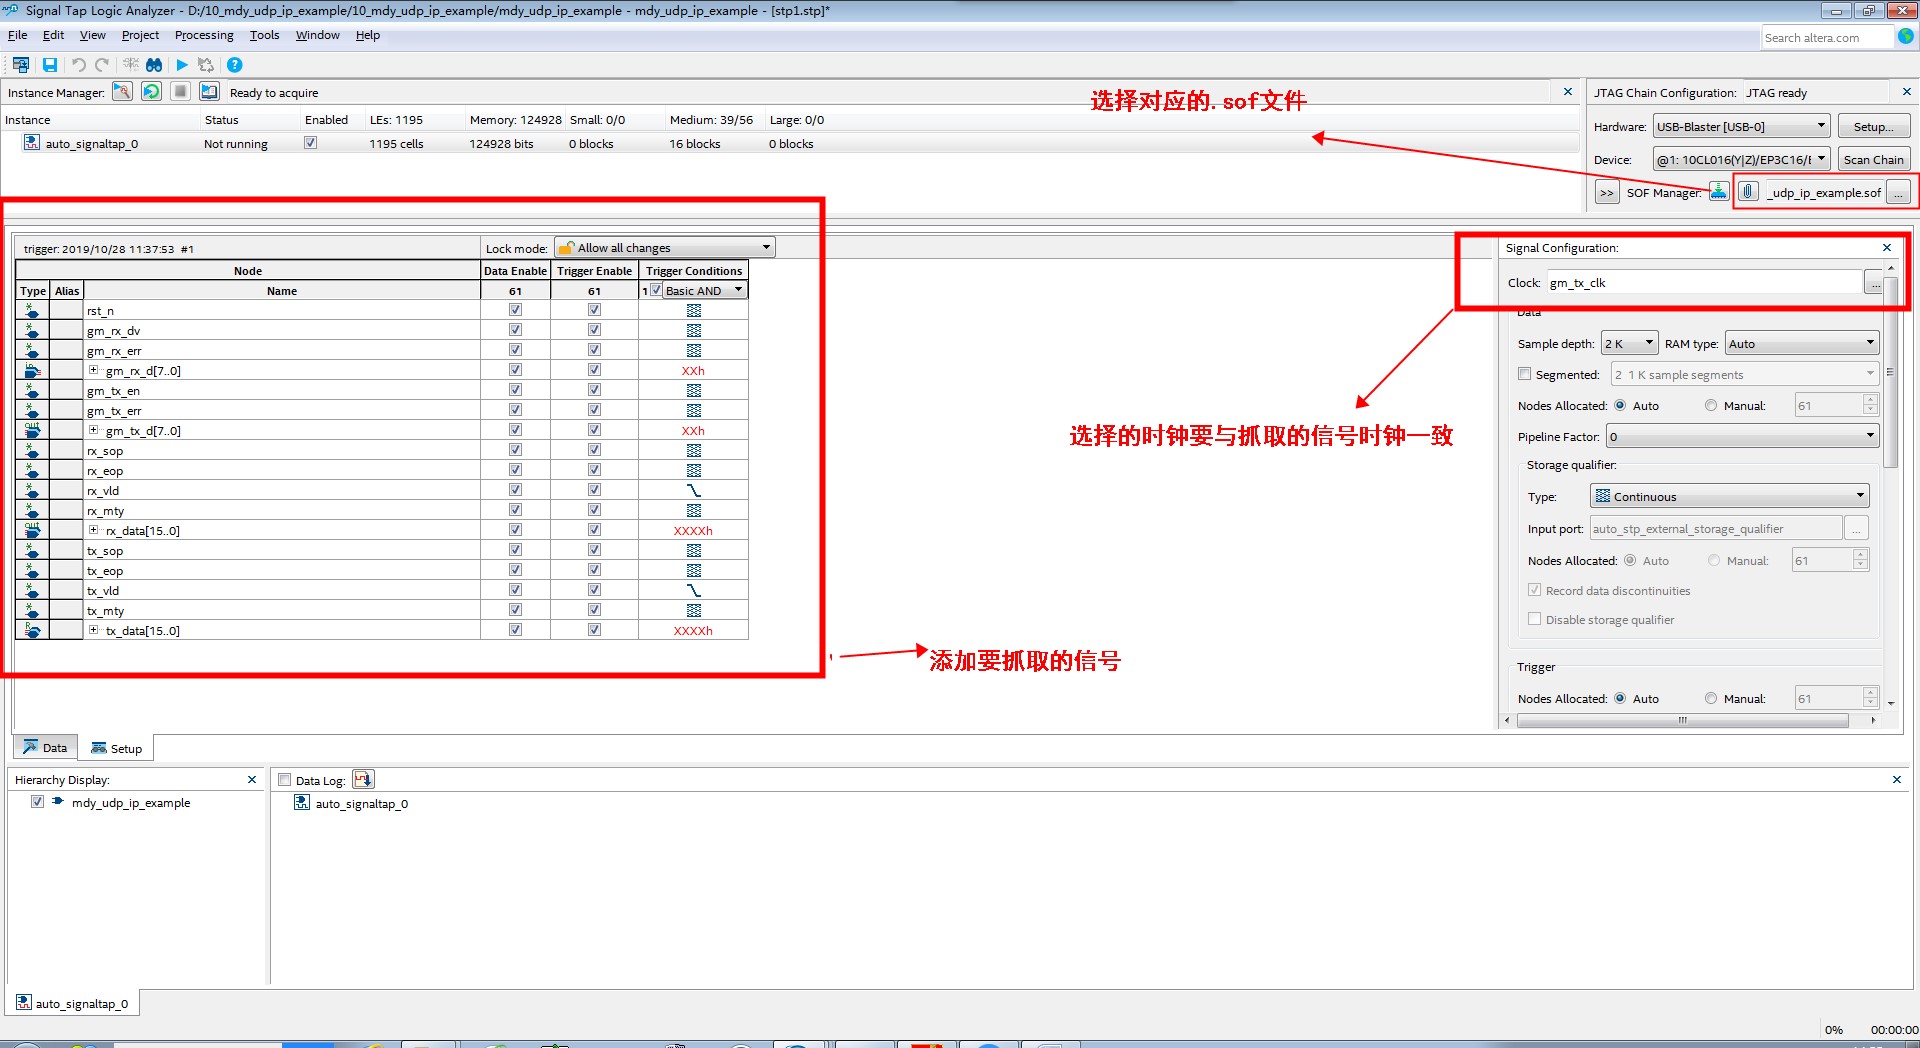
8. 点击开始发包
9. SignalTap 开始抓取信号,对比小兵发送的数据是否一致。
以上就是整个千兆网工程的演示,想要更多相关资料就赶紧联系吧!